Over the years, knitting has become immensely popular among people of all ages. Knitting not only helps in making beautiful clothes, but it is also a relaxing and rewarding hobby.
As well as getting enjoyment from the actual method of knitting, you can also create things for you and for your friends and family that can be helpful, such as blankets and clothing with the knitting yarn. The more you learn, the more things you will be able to knit, and you can knit yourself your own unique clothing as per your requirements.
Unlike the stigma linked with knitting, it can be considered as the most ‘perfect’ hobby one can opt for in their life. It’s a hobby that can be learned by people of all ages, genders, regions, and so on. It does wonders on your mind, body, and soul while providing you with something to relish for the rest of your life.
Must-have Knitting Tools for Beginners and Beyond
It goes without saying that the appeal of knitting lies in its simplicity. Any person can learn how to knit, and you don’t require a lot of expensive material or equipment. All you need is some hand knitting yarn and a pair of needles for beginner knitting kits. Take a look at our knitting patterns, many of them are free! And once you have learned the basics, there are countless opportunities for what you can create. As a beginner, it can be overwhelming for you to know the tools required for knitting. However, some essential tools can reduce the effort needed in knitting by making your journey much smoother. Let us take a quick look at some of the crucial tools necessary for knitting:
Selecting the right type of yarn can be a tricky deal. Some will prefer wool, some acrylic, and some cotton. While cotton is suitable for the warmer weather, wool is good for the colder weather. Along the same lines, acrylic is long-lasting and easy to maintain, but yarn selection also depends upon the needle size. To summarise, the yarn selection depends on weather conditions and sometimes on proficiency level. A small, medium-weight yarn in acrylic or wool blend is an excellent choice for beginners. The knitter also looks at the yarn label and the needle size when they choose to buy yarn online.
As a beginner, it is essential for you to select the correct needle so that you can knit with ease. An ideal pick can be a bamboo or wooden needle, as they provide a natural and slightly textured surface, which allows a firmer grip while you knit. The point is that beginners prefer a firmer grip, so bamboo or wooden needles are good for them. However, there is no particular needle that is preferable.
In addition to knitting yarns and needles, knitters will also require a high quality scissor made out of stainless steel with sharp edges. A good quality scissor will help you cut the yarn neatly, and this makes Scissors one of the prime requirements in knitting.
Marking specific measures is an essential requirement when knitting. As you finish the first knitting row or select the yarn for the knitting row, you must put a mark on the yarn, for which you will need a stitch marker.
Let's face it, knitting is a beneficial hobby to have. With that said, while knitting is one of the most common crafts among people of all ages, if you've never picked up a set of needles before, it can be hard to know where to begin. Not to worry, read on to find out the steps to knit a pattern:
The cast-on is the most essential set of steps in knitting, where we create the foundation row of stitches on your needle. Apart from the prerequisites, there are 12 steps involved in this process, which are as follows:
How to Cast On
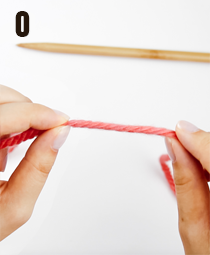
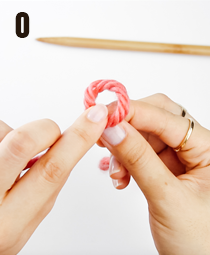
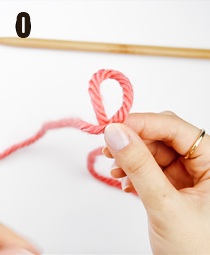
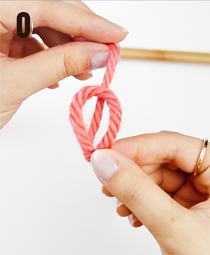
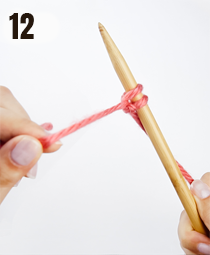
Step 1: Starting the Cast-On Process in Knitting
Start the cast-on process by placing the slip knot over the needle and then tighten the knot by pulling the yarn tails.
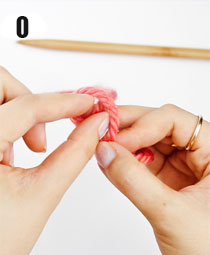
Step 2: Preparation for the Cast-On
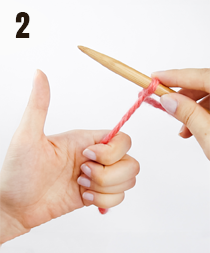
Once you have placed the slip knot, pick the shorter yarn tail and do a thumbs-up.
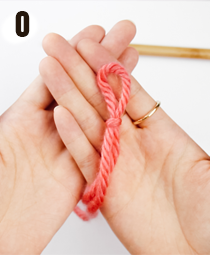
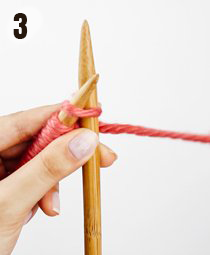
Step 3: Creating the first stitch
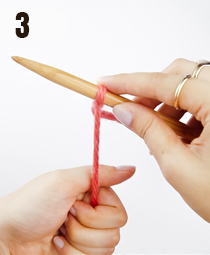
Proceed further and make a loop by waving your thumb behind the yarn.
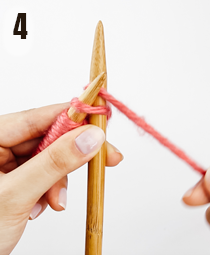
Step 4: Making the Foundation Row
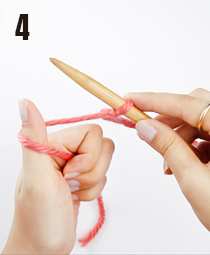
Form a hook with the yarn onto the thumb. Make sure the grip is firm.
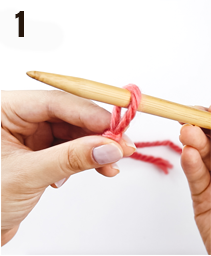
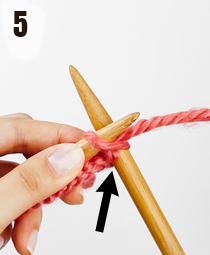
Step 5: Secure the yarn on the thumb for the first row
Once you have formed the hook onto the thumb, touch the front of the thumb with the needle.
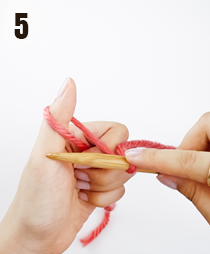
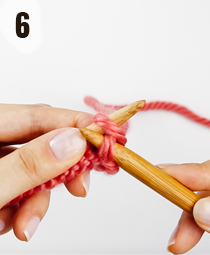
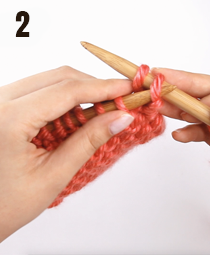
Step 6: Sliding the needle
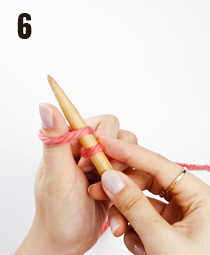
Slide the needle inside the loop over your thumb.
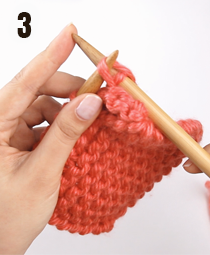
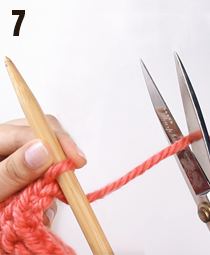
Step 7: Grab the Yarn with Your Right Hand
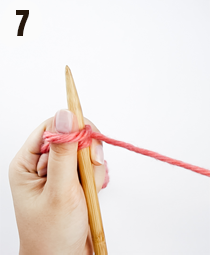
While holding the needle with your left hand, grab the yarn connected to the ball with your right hand.
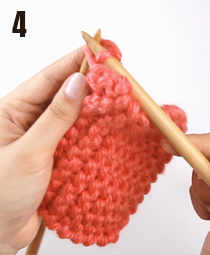
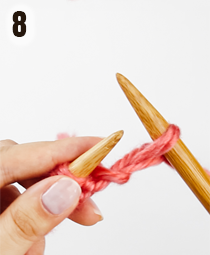
Step 8: Roll the Yarn around the Needle from Back to Front
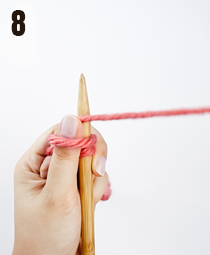
Once you have grabbed the yarn with your right hand, roll the yarn around the needle from the backside to the front side.
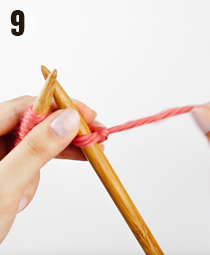
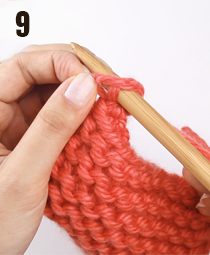
Step 9: Pull the Yarn towards the Thumb
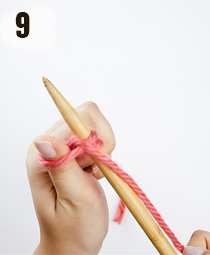
Once you have rolled the yarn around the needle, pull the yarn down to touch the loop on the thumb.
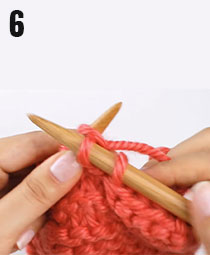
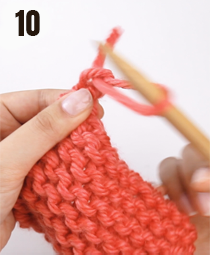
Step 10: Pull the loop over the needle on the thumb
After pulling the yarn down to touch the loop, pull the loop over the needle from the thumb.
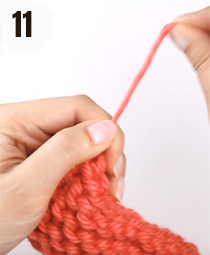
Step 11: Put the loop on the needle

Once you have pulled the loop over the needle from the thumb, put the loop on the needle from the thumb.
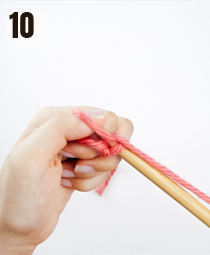
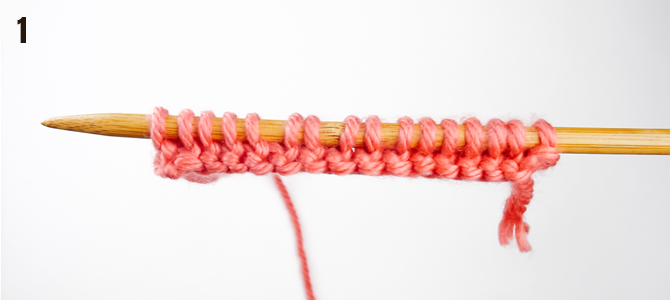
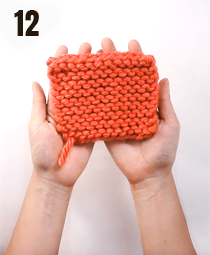
Step 12: Tighten the new stitch
Tighten the new stitch by pulling down the yarn. That is it; the cast-on step is complete. Repeat steps 2-12.
The knit stitch is one of the basic stitches in knitting. It's created with the help of a right hand and hand needle. To understand the steps in detail, read through the below steps:
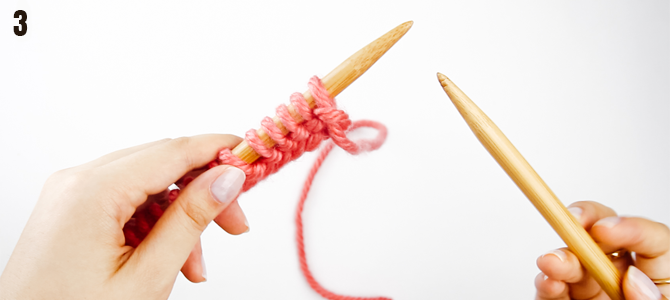
Step 1: Put the right needle into the starting stitch
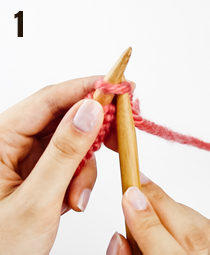
Begin by inserting the right needle into the starting stitch by moving it to the top from the bottom.
Step 2: Push into the stitch
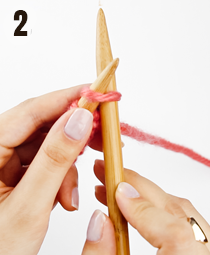
Once you have inserted the right needle into the starting stitch, push the right needle further into the stitch.
Step 3: Grab the Yarn
Pick the yarn connected to the ball with your right hand.
Step 4: Roll the yarn from the back to the front
After picking the yarn, wrap the yarn around the needle to the front from the back.
Step 5: Pull the yarn
Pull the yarn downward, and you will notice the yarn glint through the stitch.
Step 6: Pick the yarn on the needle
Once you notice the yarn glint through the stitch, pull the needles down and pick the yarn on the needle.
Step 7: Push the right needle inside the loop

Push the right needle inside the loop. You are ready with the new stitch!
Step 8: Detach the needles

To move forward, detach the needle on the right from the left.
Step 9: Unwind the yarn
Unwind the yarn attached to the ball of yarn to tighten the stitch. Repeat steps 1-9.
Spin the needle toward the right
As we end the knitting row, we require spinning the needle around so the working yarn is on the right side. Keep moving until your knitting becomes long enough as you require it to be.

The casting-off or binding-off finishes the work by moving the stitches out of the needle. For casting off, the beginner must work the first two stitches as expected, pass the first stitch over the second stitch, and move it off the right-hand needle. You repeat this process, as explained below:
Tip: As you cast off, make sure that you know that you always require two stitches for casting off on the right needle. It should always be exactly 2.
Step 1: The first step for casting off
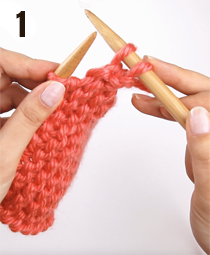
Start the cast-off step by knitting the two stitches.
Step 2:Slide the left needle
In the second step of casting off, slide the left needle Inside the first stitch.
Step 3: Pull the first stitch over the second
Once you slide the left needle inside the first stitch, pull the first stitch over the second stitch.
Step 4: Take out the needle
Pull the first stitch over to the second and then out of the needle.
Step 5: Complete a Knit Stitch and Cast Off

You end up with one stitch on the right needle. And you have cast off the other one!
Step 6: Continue with the knitting pattern
When the last stitch is left on the needle, knit it to finish off the knitting row or the round. Repeat steps 2-6 until only one stitch is left.
Step 7: Cut the yarn tail
Once left with one stitch, cut off a 10’’ yarn tail.
Step 8: Wrap the yarn around the needle
After cutting the yarn tail, wrap the yarn around the needle.
Step 9: Pull the stitch over the yarn tail
Pull the stitch over the yarn tail after wrapping the yarn around the needle.
Step 10: Pull the yarn tail through the needle
Once you have pulled the stitch, pull the yarn tail through the needle.
Step 11: Tighten the yarn tail
Finally, tighten up the yarn tail by pulling it.
Step 12: Finalise your entire process
The knitting is finally off the needle securely and safely.
When you first select a pair of needles, knitting can seem like a daunting task. From sorting out how to read a pattern to understanding abbreviations that seem to be written in code, learning how to knit can feel intimidating. With these knitting patterns meant for beginners, you'll be on your destination to becoming a knitting pro in no time.:
Beginner knitting does not get much easier than Fingerless gloves. It's a knitting pattern that involves a blend of knit and purl stitches for the creation of a ribbed structure, which is perfect for practising for both beginners and experienced professionals. With this pattern, you can make a comfortable wearable for your hands, which will keep them warm while doing any work requiring fingers.
If the idea of selecting a pair of knitting needles seems a bit intimidating, have a go at our Cable-knit sweaters. This Knitting pattern helps you create a textured fabric that is wonderful in look and perfect for keeping you safe from the cold and making you comfortable in icy conditions, for which you need to use the best quality wool. This cable pattern is developed through twisting and crossing sections of stitches that give the sweater a unique look. The pattern can be complex if you want to improve the design or if it remains simple.
When it comes to knitting patterns for beginners, the blanket pattern is an excellent place to begin.This comprises simple knit stitches and purl stitches. Each row has a width, and we have a certain number of such rows. Different rows can be of different colours and yarns or the same type. Similarly, we can transform the design by combining the knit and purl stitches in different formats based on our selected design pattern.
In recent years, there has been a growing demand for sustainable and eco-friendly fashion, and knitting is turning into a popular choice for people of all ages Knitting can not only be used to create a wide range of garments and textile products, including sweaters, scarves, hats, blankets, and socks, but also provides a way to spend your free time to explore and showcase your creativity. By following the above-mentioned steps, you can create high-quality knitting patterns effortlessly. Are you looking to knit a knitting pattern and searching for a high quality yarn? Well, then look no further than Stitcher. Stitcher is the home of Cross Stitch Kits UK and all things needlecraft. We sell the best quality knitting yarn, including Lion Brand Yarn. Lion Brand Yarn Company is a fifth-generation, family-owned business based in Lyndhurst, New Jersey, and has been a beloved brand since 1878. We also sell DMC Yarn at a price that’ll fit right into your budget.